
How to Record Expenses, Income & Manage Your Finances with Nexa
Three ways to keep your books up to date — pick the one that works best for you
Table of Contents
If you run a business in Nigeria — whether you sell products, offer services, or manage a team — keeping track of your money is non-negotiable. Knowing what came in and what went out each month is the difference between running your business confidently and being surprised at the end of every month.
Nexa makes this simple. You don't need a spreadsheet, an accountant on call, or any financial background. This guide will walk you through exactly how to record your expenses and income on Nexa — step by step — and show you three different ways to do it so you can choose the one that fits how you work.
Why Recording Expenses and Income Matters
Most business owners feel like they have a rough idea of where their money goes. But "rough" isn't good enough when you need to pay staff, file taxes, or decide whether to restock inventory.
See Your Real Profit
Revenue is not profit. You may have received ₦500,000 this month, but after rent, salaries, and restocking, your actual profit could be far less. Tracking both sides gives you the truth.
Catch Spending Leaks Early
Small recurring costs — subscriptions, bank charges, minor purchases — add up fast. When every naira is recorded, you spot waste before it becomes a problem.
Stay Ready for Tax Season
FIRS and state tax authorities require documented records. Nexa keeps all your transactions organised so tax season is never a scramble.
Make Smarter Decisions
Should you hire someone new? Can you afford that equipment? Good records give you real data to make confident decisions instead of guessing.
Nexa makes it easy to record every transaction — whether you do it one entry at a time, upload your bank statement in bulk, or simply describe it to Nexa AI.
Start Tracking Your Business Finances Today
Join thousands of Nigerian businesses using Nexa to record income and expenses, all in one place.
Create Your Free AccountMethod 1: Record an Expense Manually
Best for: recording individual expenses as they happen
Any time money leaves your business — whether you paid for electricity, bought materials, or settled a supplier — you should record it as an expense. Here's how to do it on Nexa:
Step 1: Open the Expenses Tab
Tap Expenses in the bottom navigation bar. You'll see your expenses list with the total at the top. Tap the + button (blue circle, bottom right) to create a new expense.
Step 2: Enter the Amount
Type in the amount you spent. For example: ₦50,000 for a light token payment.
Step 3: Add a Description
Write a short description of what the expense was for. Keep it clear — e.g., "Electricity — April" or "Fabric purchase for client order." This helps you understand your records later.
Step 4: Select a Category
Tap Select Category and choose the most relevant option — e.g., Utilities, Inventory, Salaries, Transportation, etc. Categories help you see where the most money is going at a glance.
Step 5: Choose Payment Method
Select how you paid — Transfer, Cash, Card, etc. This helps you reconcile your bank account later.
Step 6: Set the Date
Tap the date field and enter the actual date the expense occurred. This ensures your records are accurate even if you're catching up on entries from earlier in the week.
Step 7: Tap "Create Expense"
Hit the purple Create Expense button at the bottom. Your expense is saved and immediately reflected in your total.
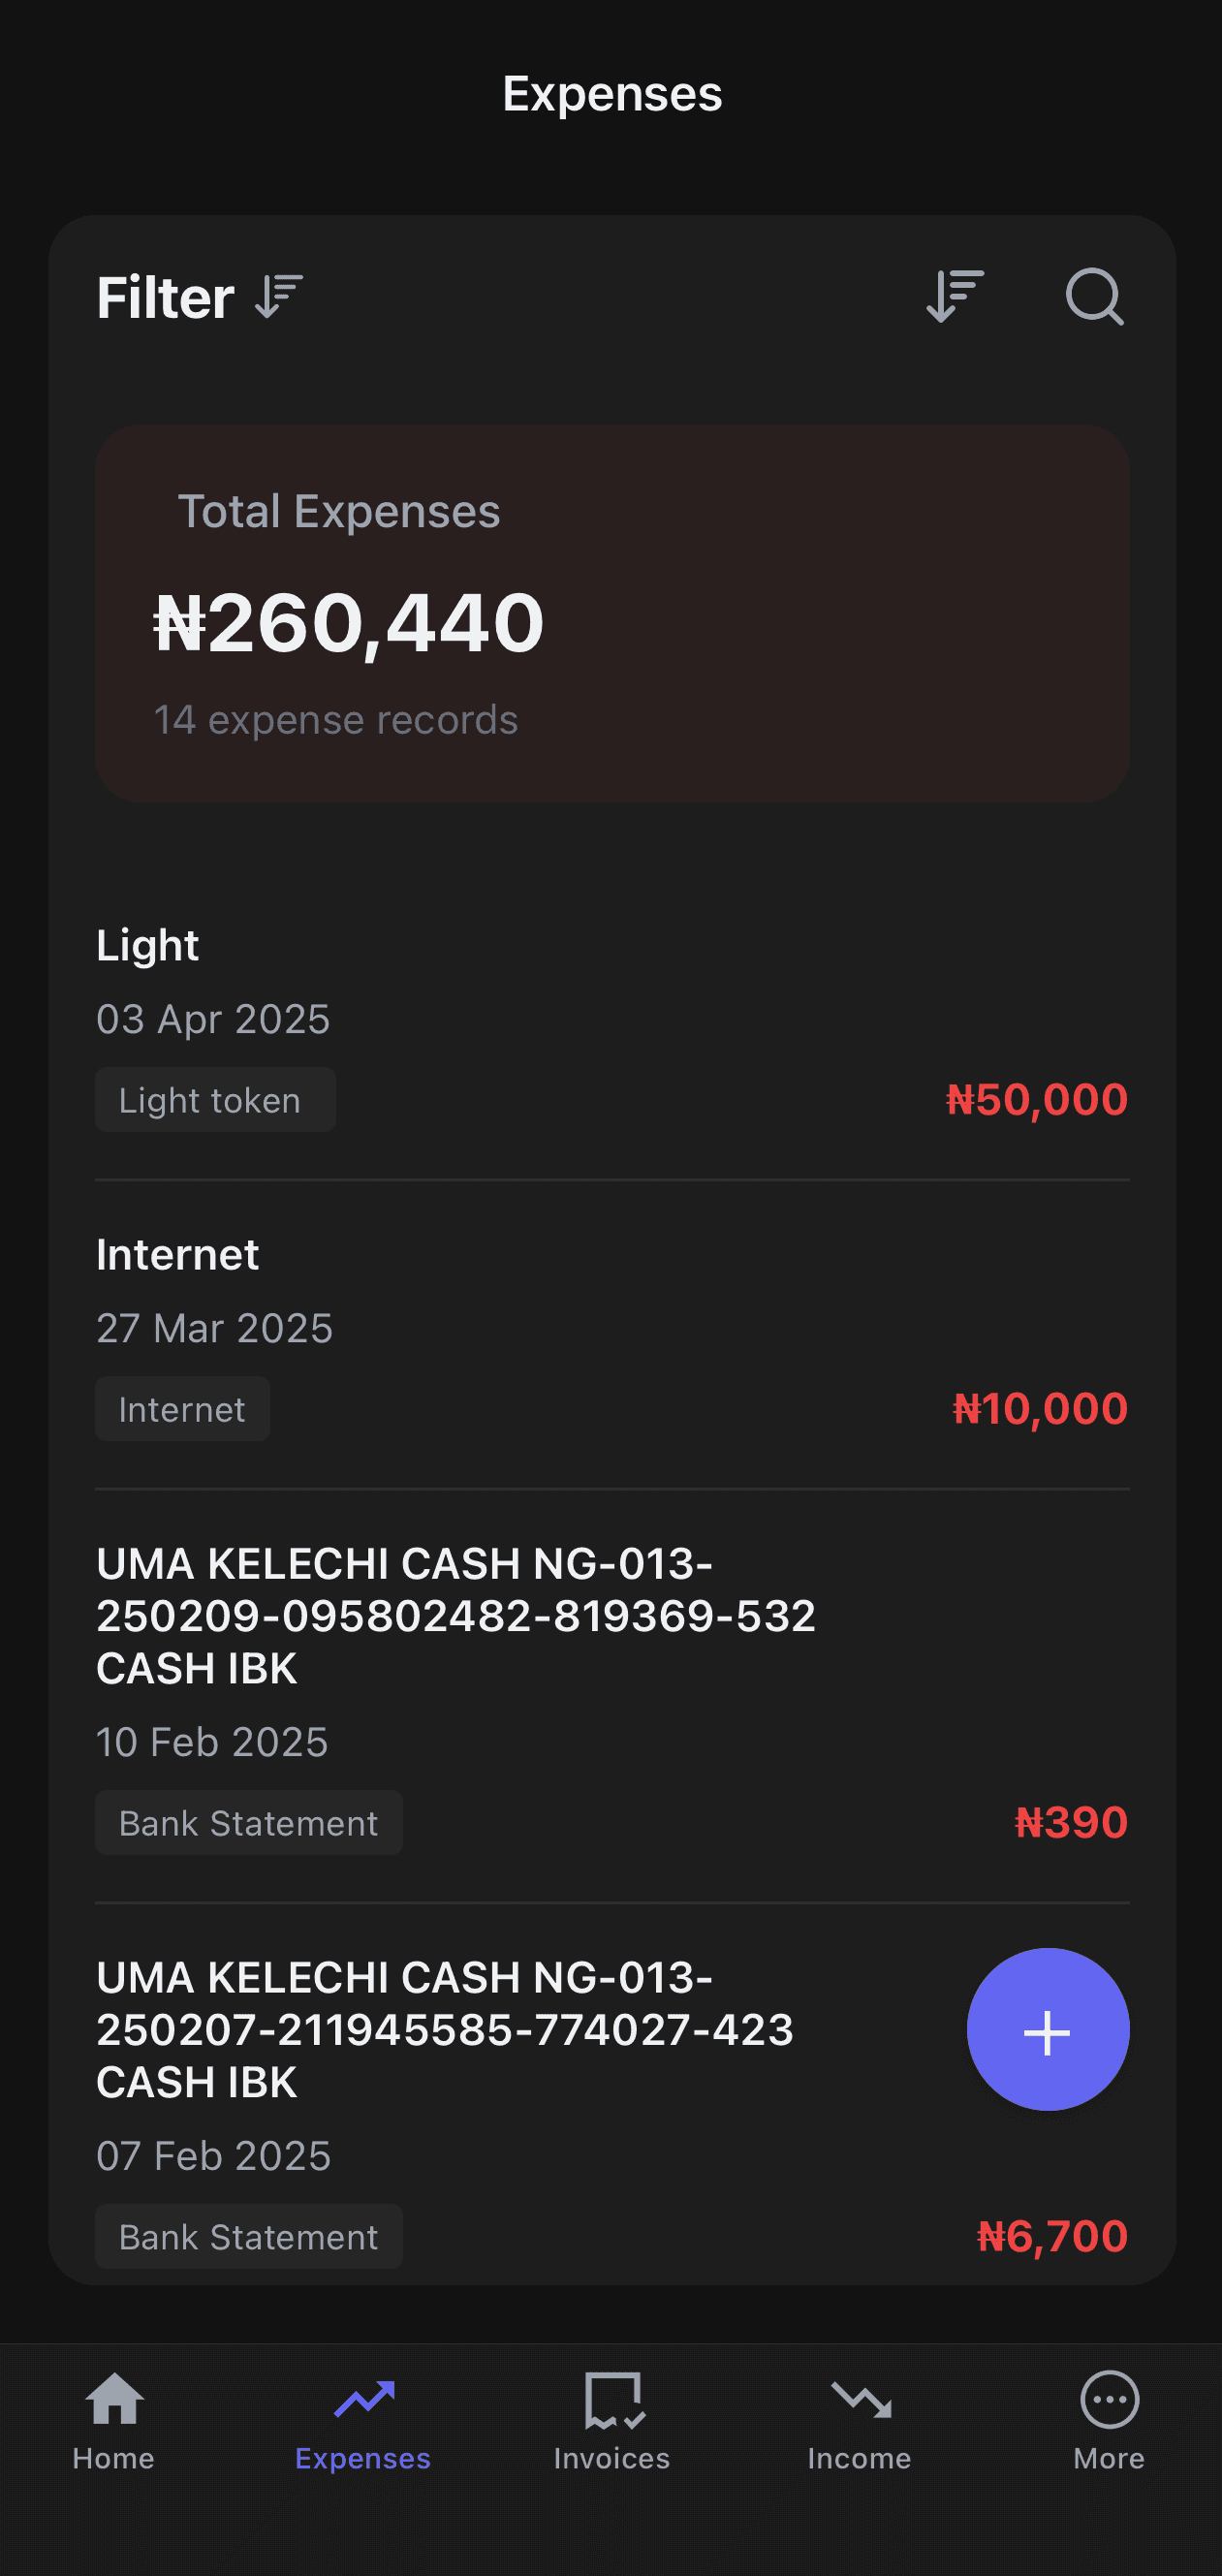
Your expenses list with total
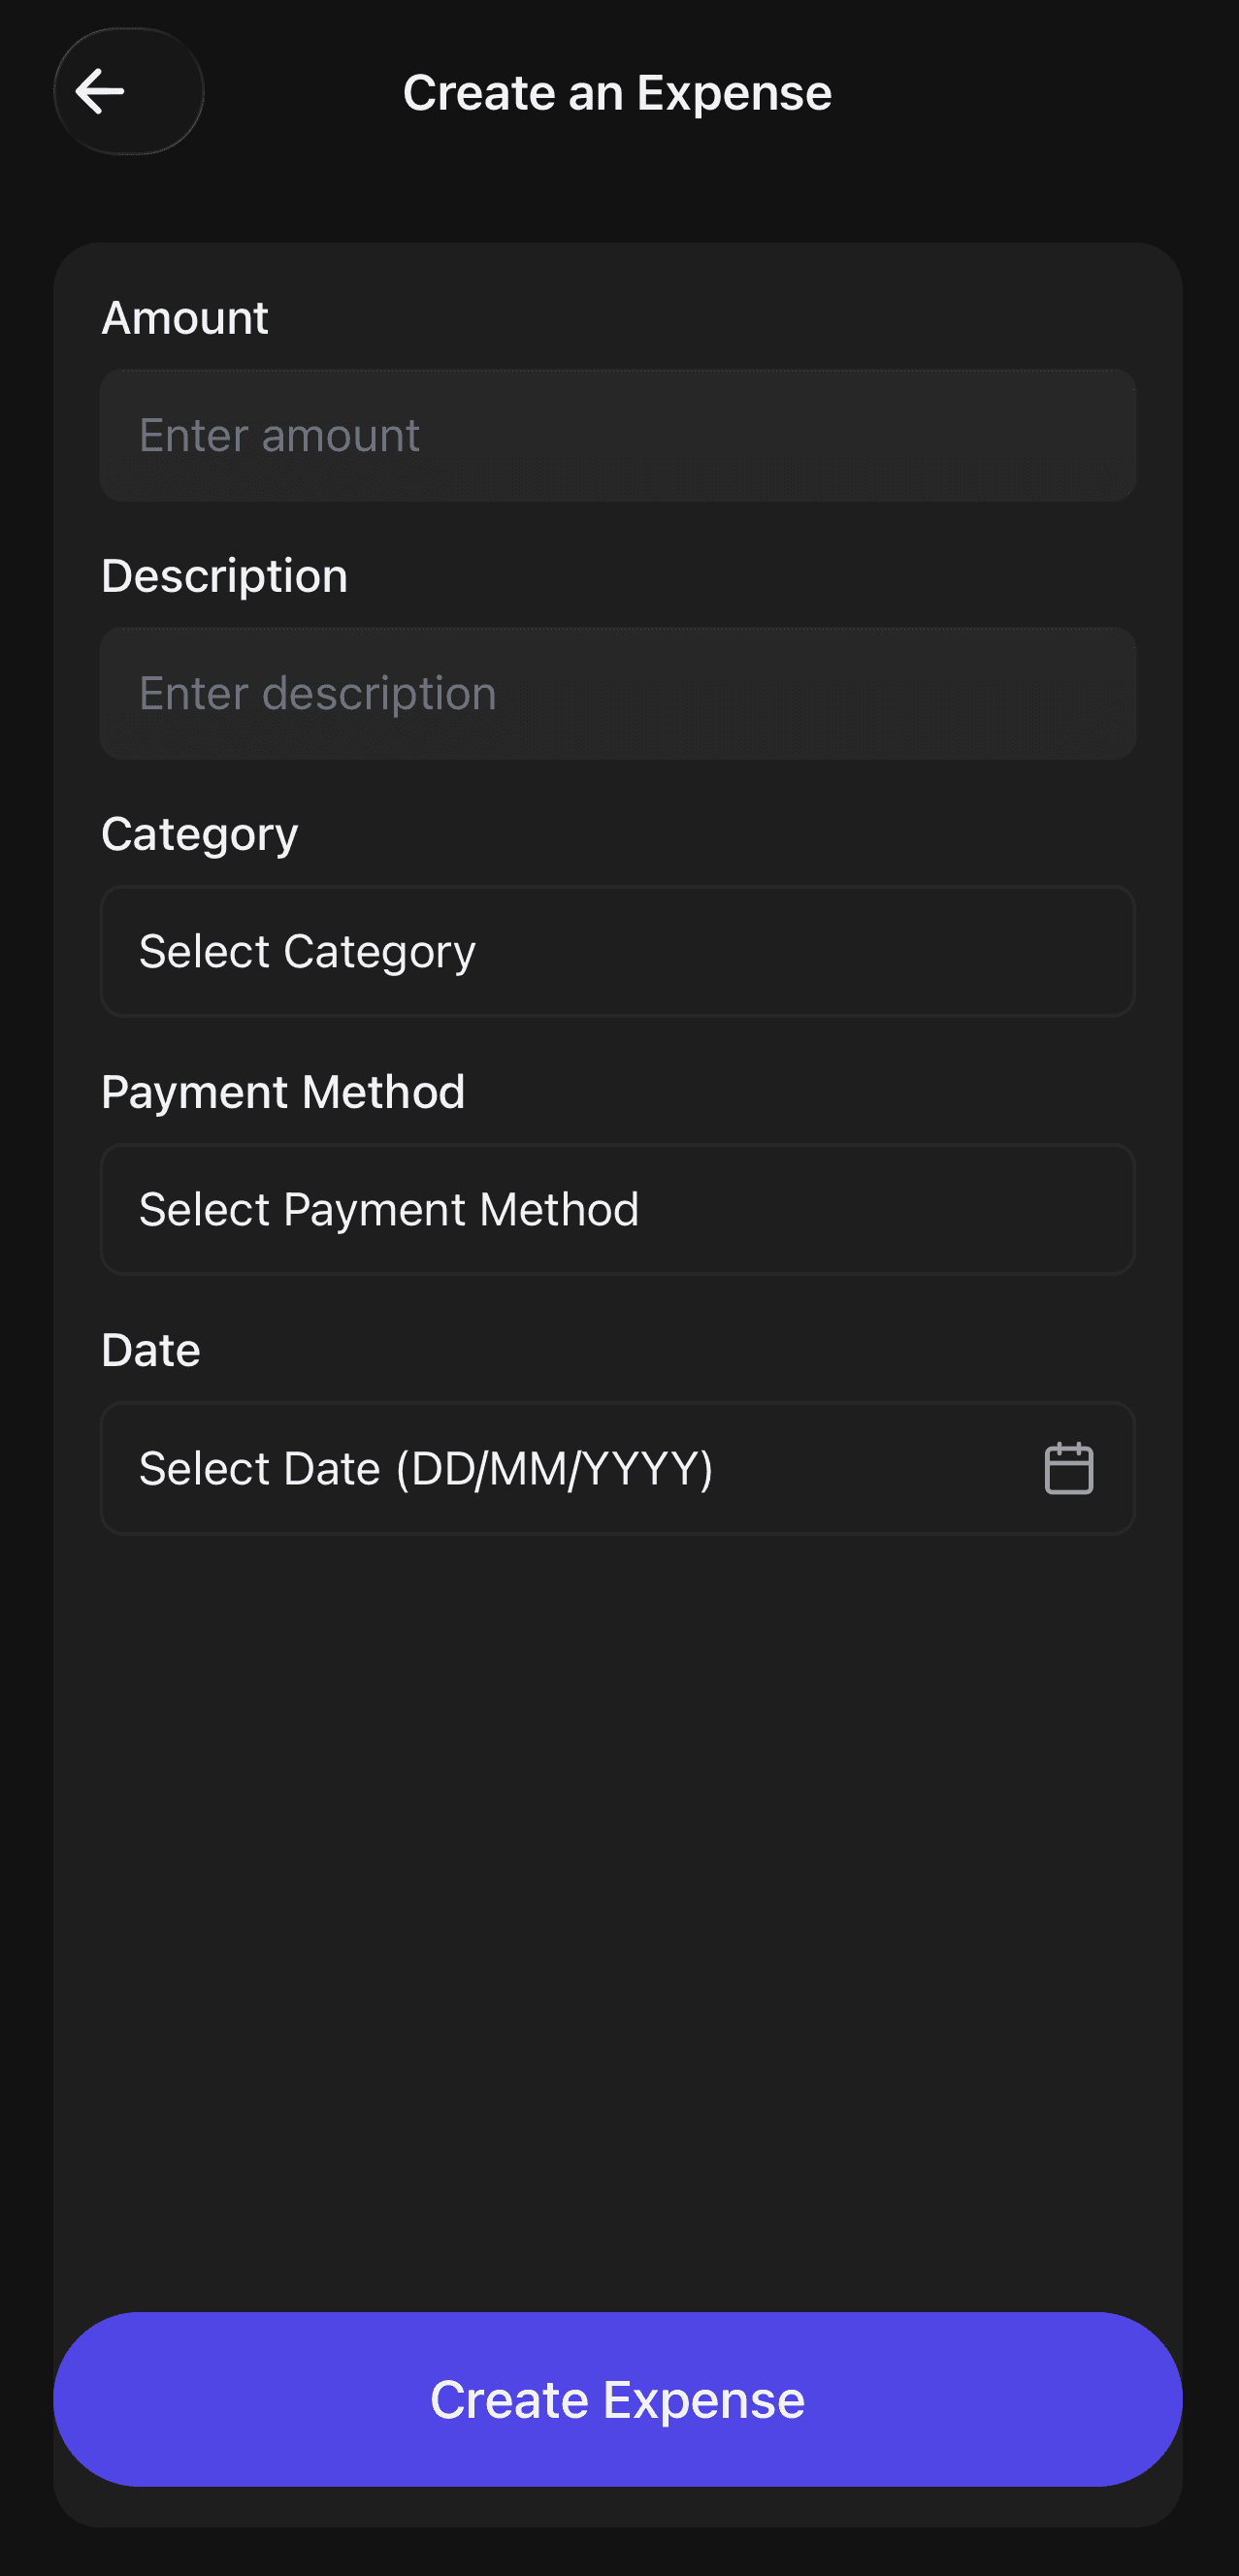
Fill in the details and tap Create
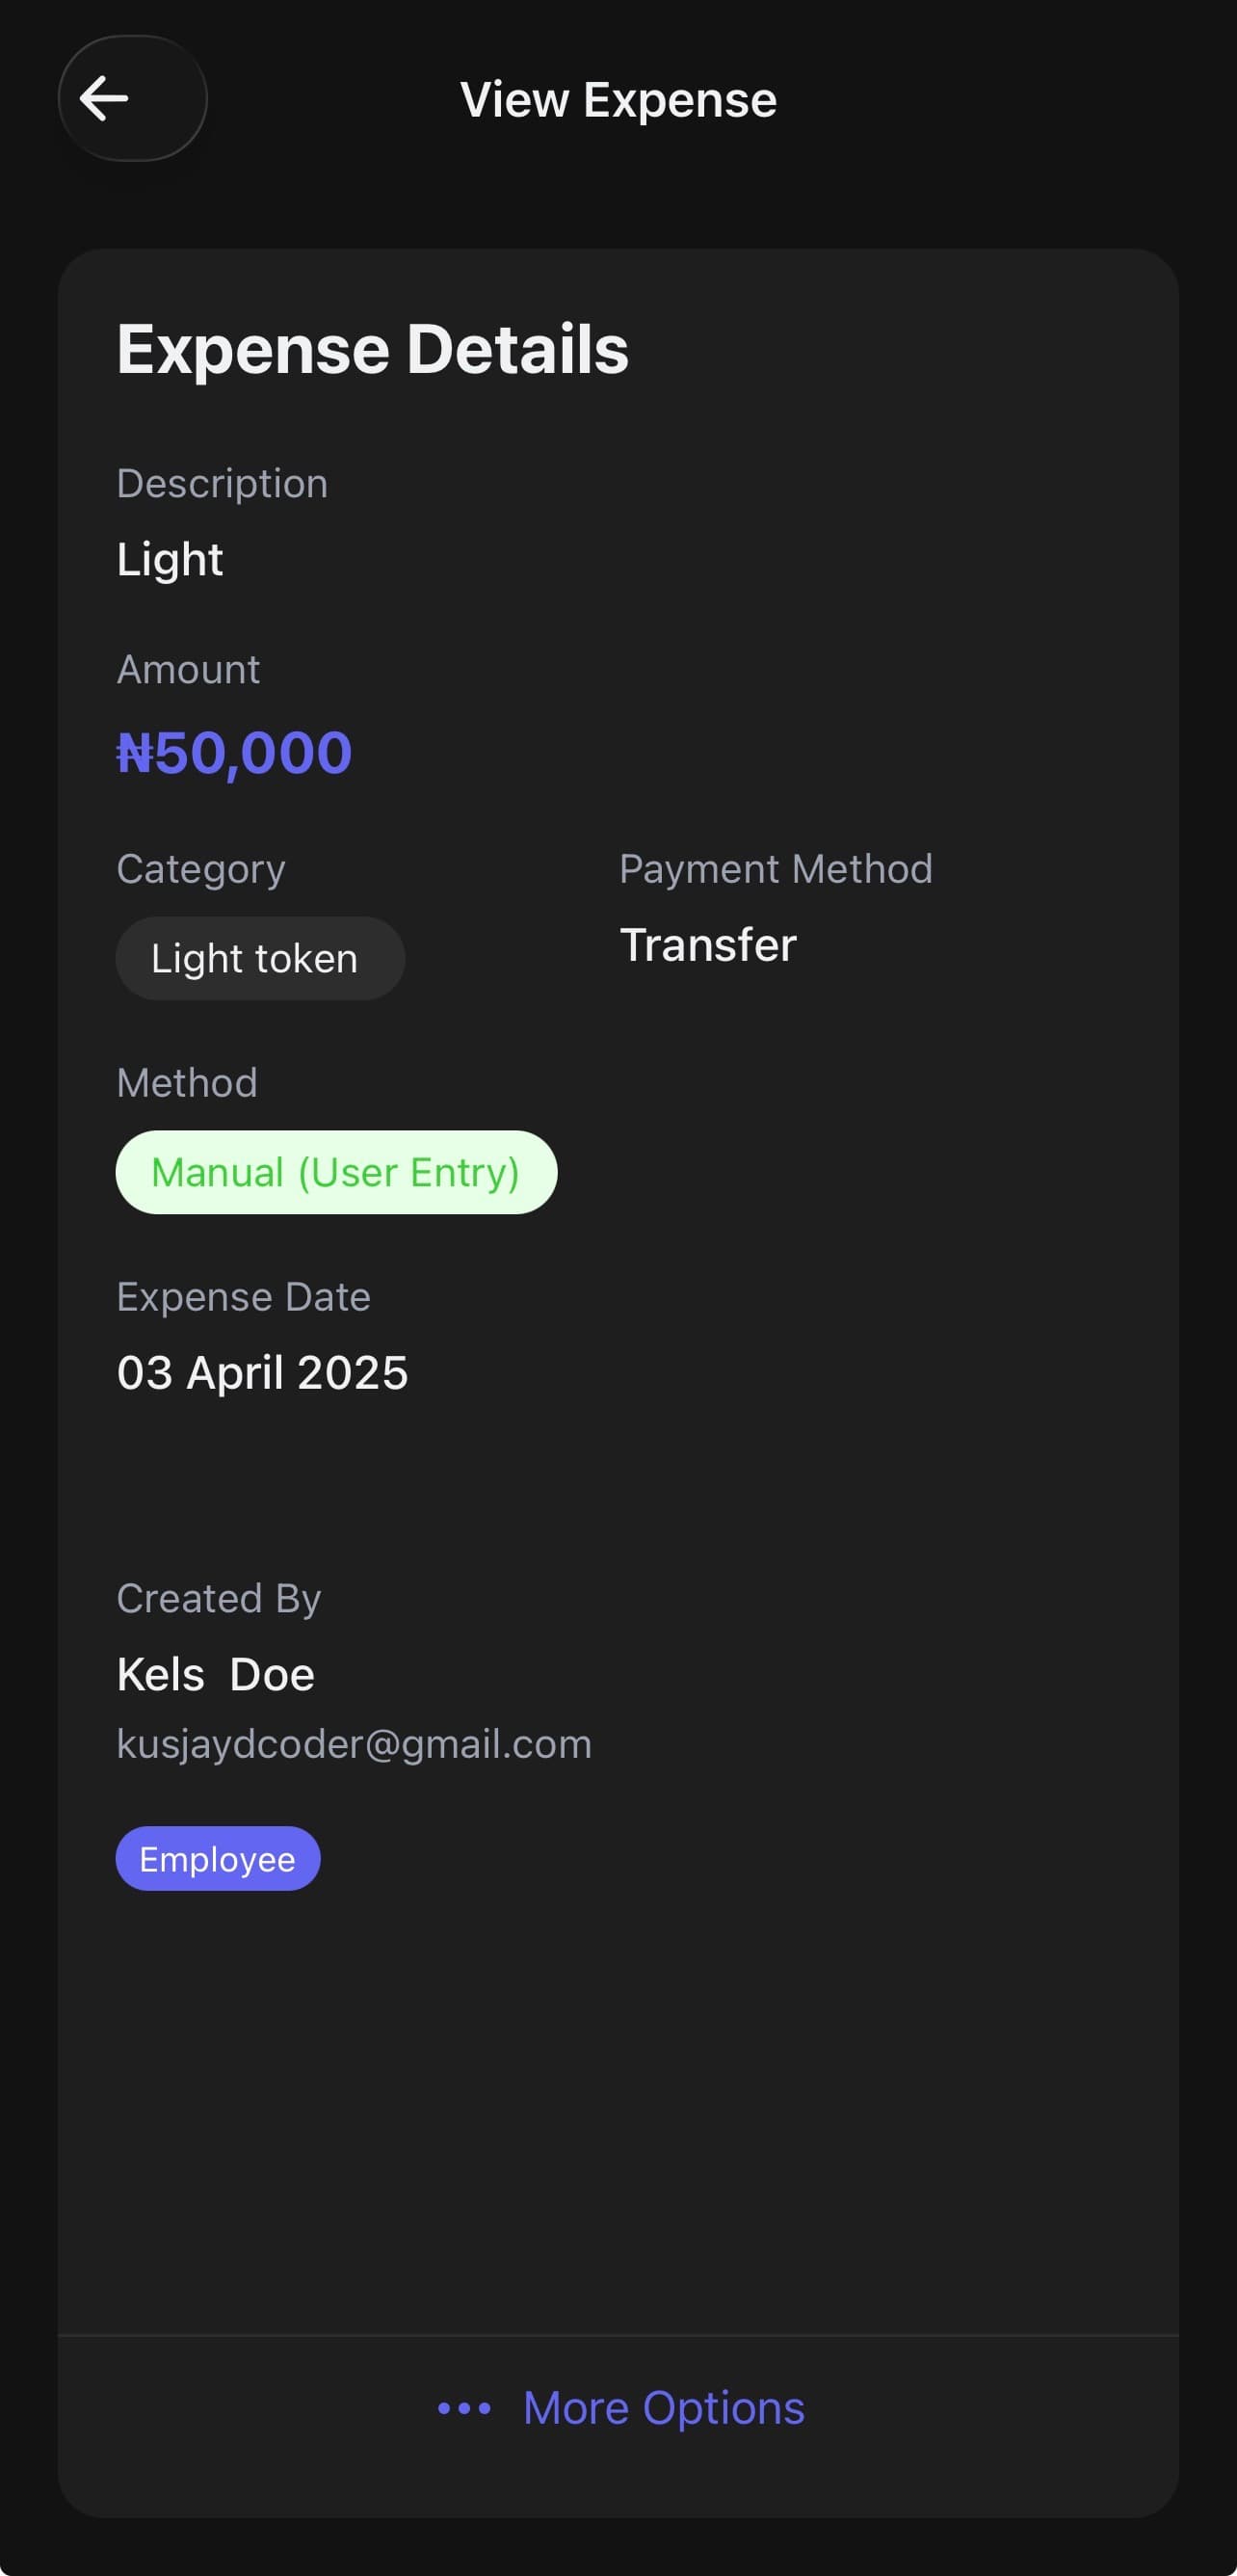
View full expense details anytime
Pro tip
Record expenses on the same day they happen. It takes less than 30 seconds and saves you from trying to remember details at the end of the month.
Method 2: Record Income Manually
Best for: recording individual payments received as they come in
Every time money comes into your business — a customer payment, a service fee, a product sale — it should be recorded as income. Here's how:
Step 1: Open the Income Tab
Tap Income in the bottom navigation bar. You'll see all recorded income entries and your total. Tap the + button to add a new one.
Step 2: Enter the Amount
Type in the exact amount received. For example: ₦200,000 for a bulk fabric order.
Step 3: Link a Customer (Optional)
If the payment is from a known customer, tap Select Customer and choose from your customer list. This keeps your customer payment history clean and connected. You can skip this if it's a walk-in or anonymous sale.
Step 4: Add a Description
Be specific. Instead of "payment," write "Sale of 10 pieces of Gucci Fabric" or "Partial payment for Black dress — INV-00002." Good descriptions make your records easy to understand months later.
Step 5: Select Payment Mode
Choose how the payment was made — Transfer, Cash, Card, or another method. This matches up with your bank statement when you reconcile.
Step 6: Set the Date
Enter the date the payment was received — not today's date if they're different. Accurate dates keep your monthly reports correct.
Step 7: Tap "Create Income"
Hit Create Income. Your income is saved, added to your total, and visible in your income list immediately.
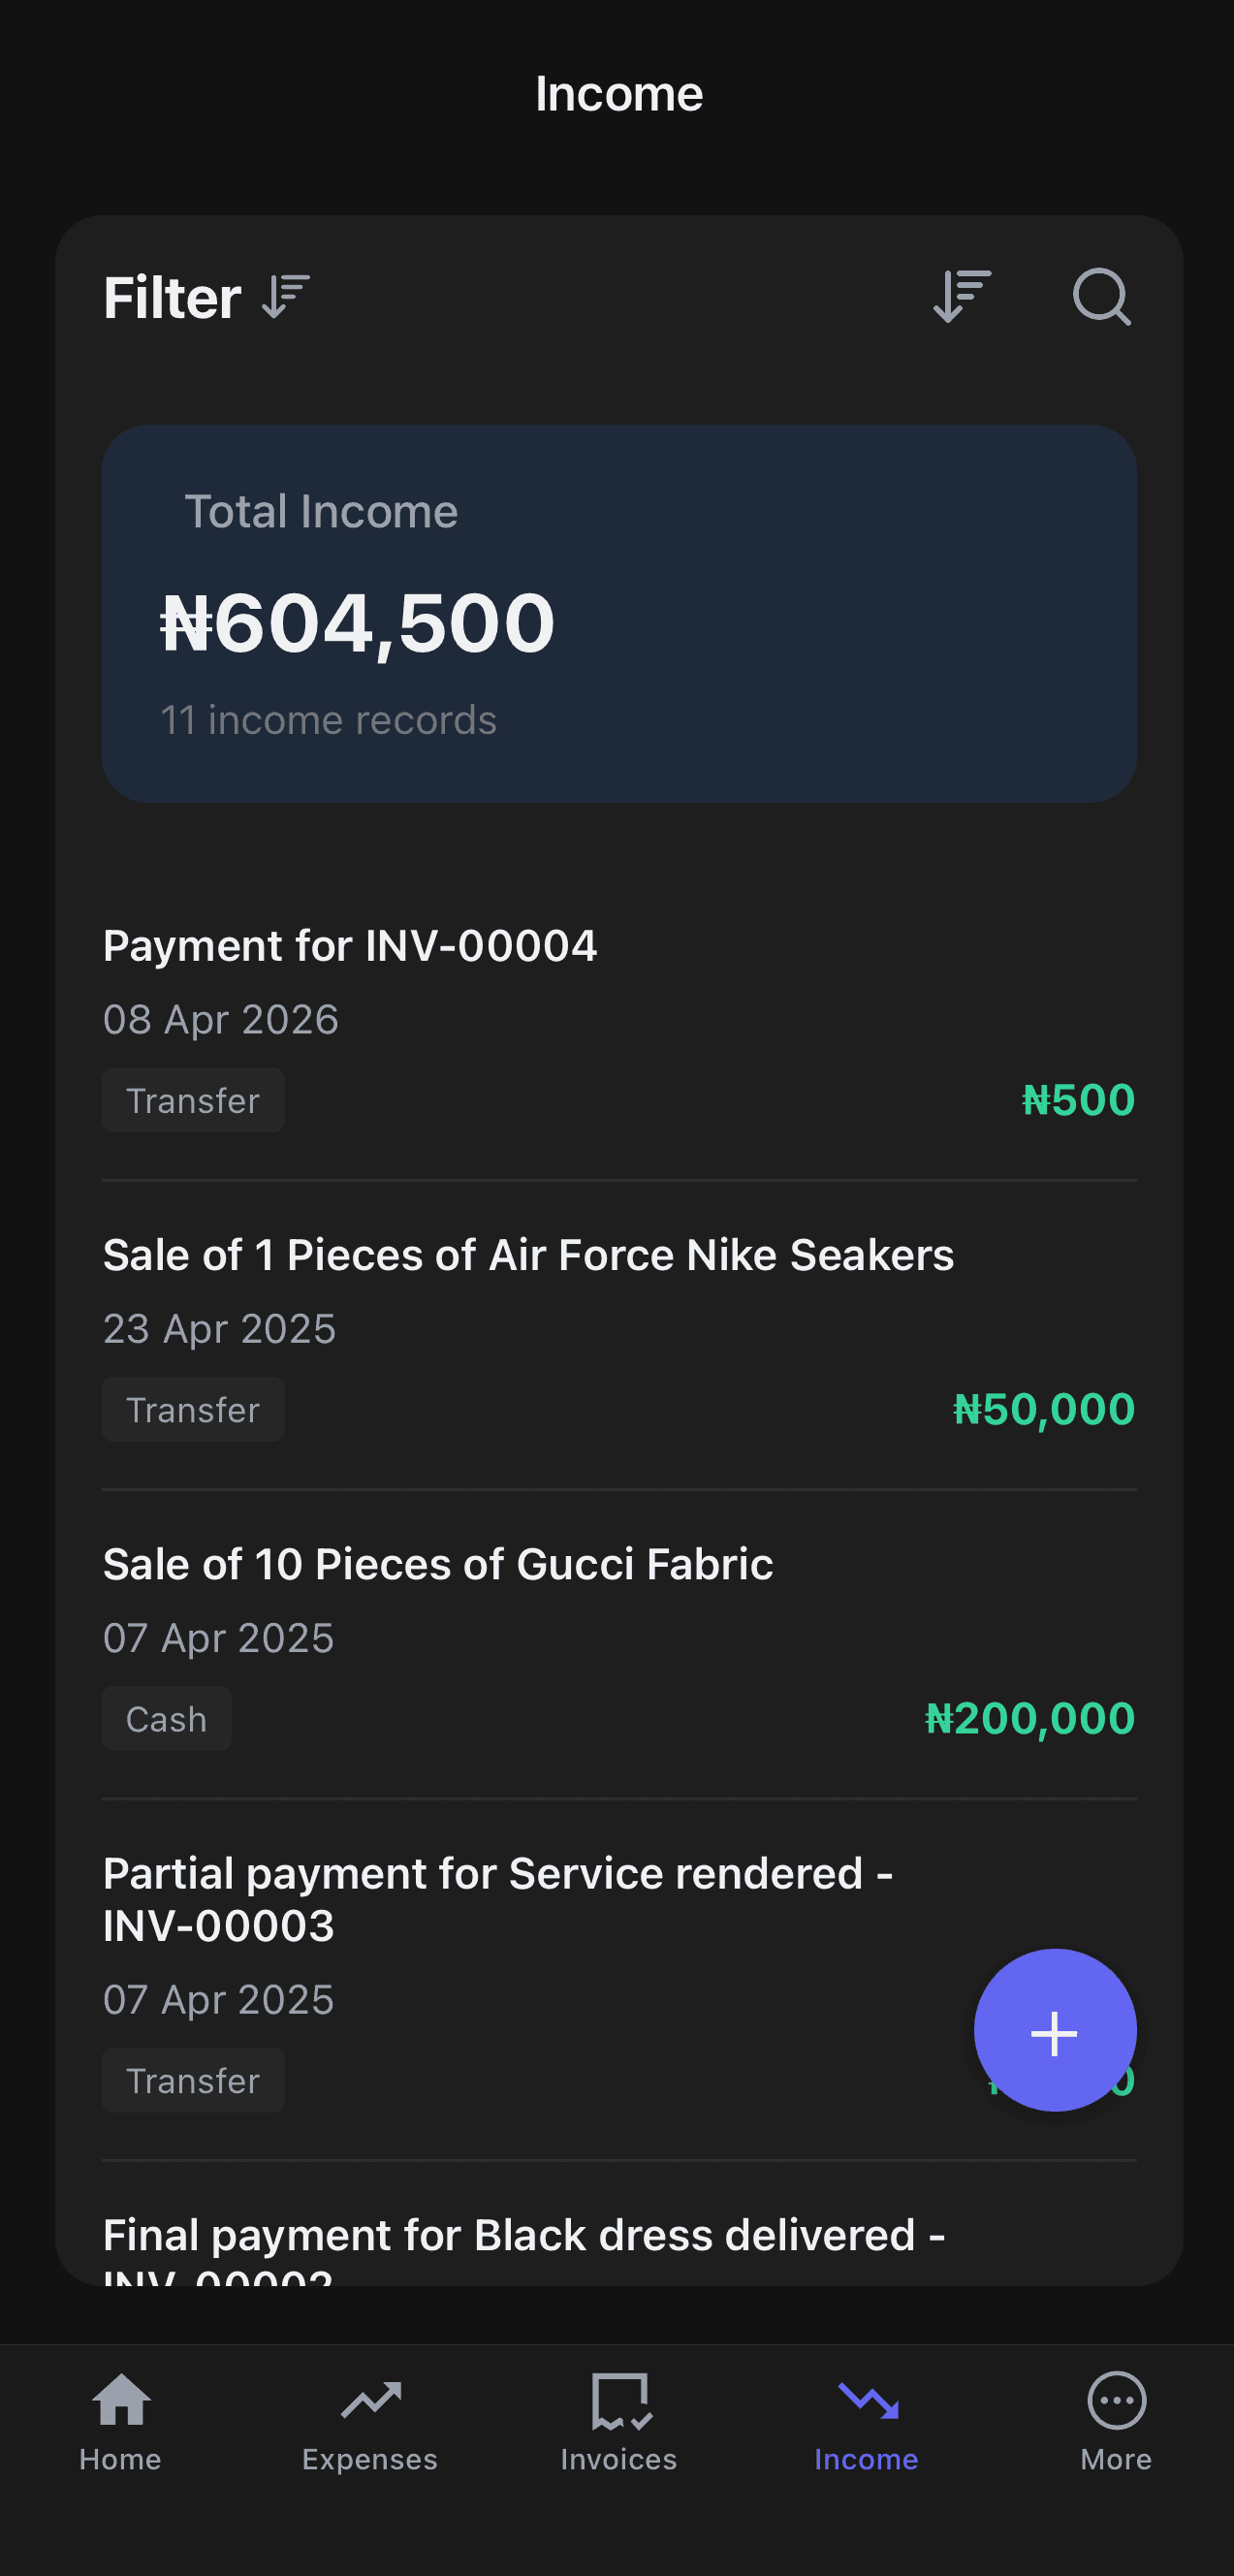
Your income list with total

Fill in the details and tap Create
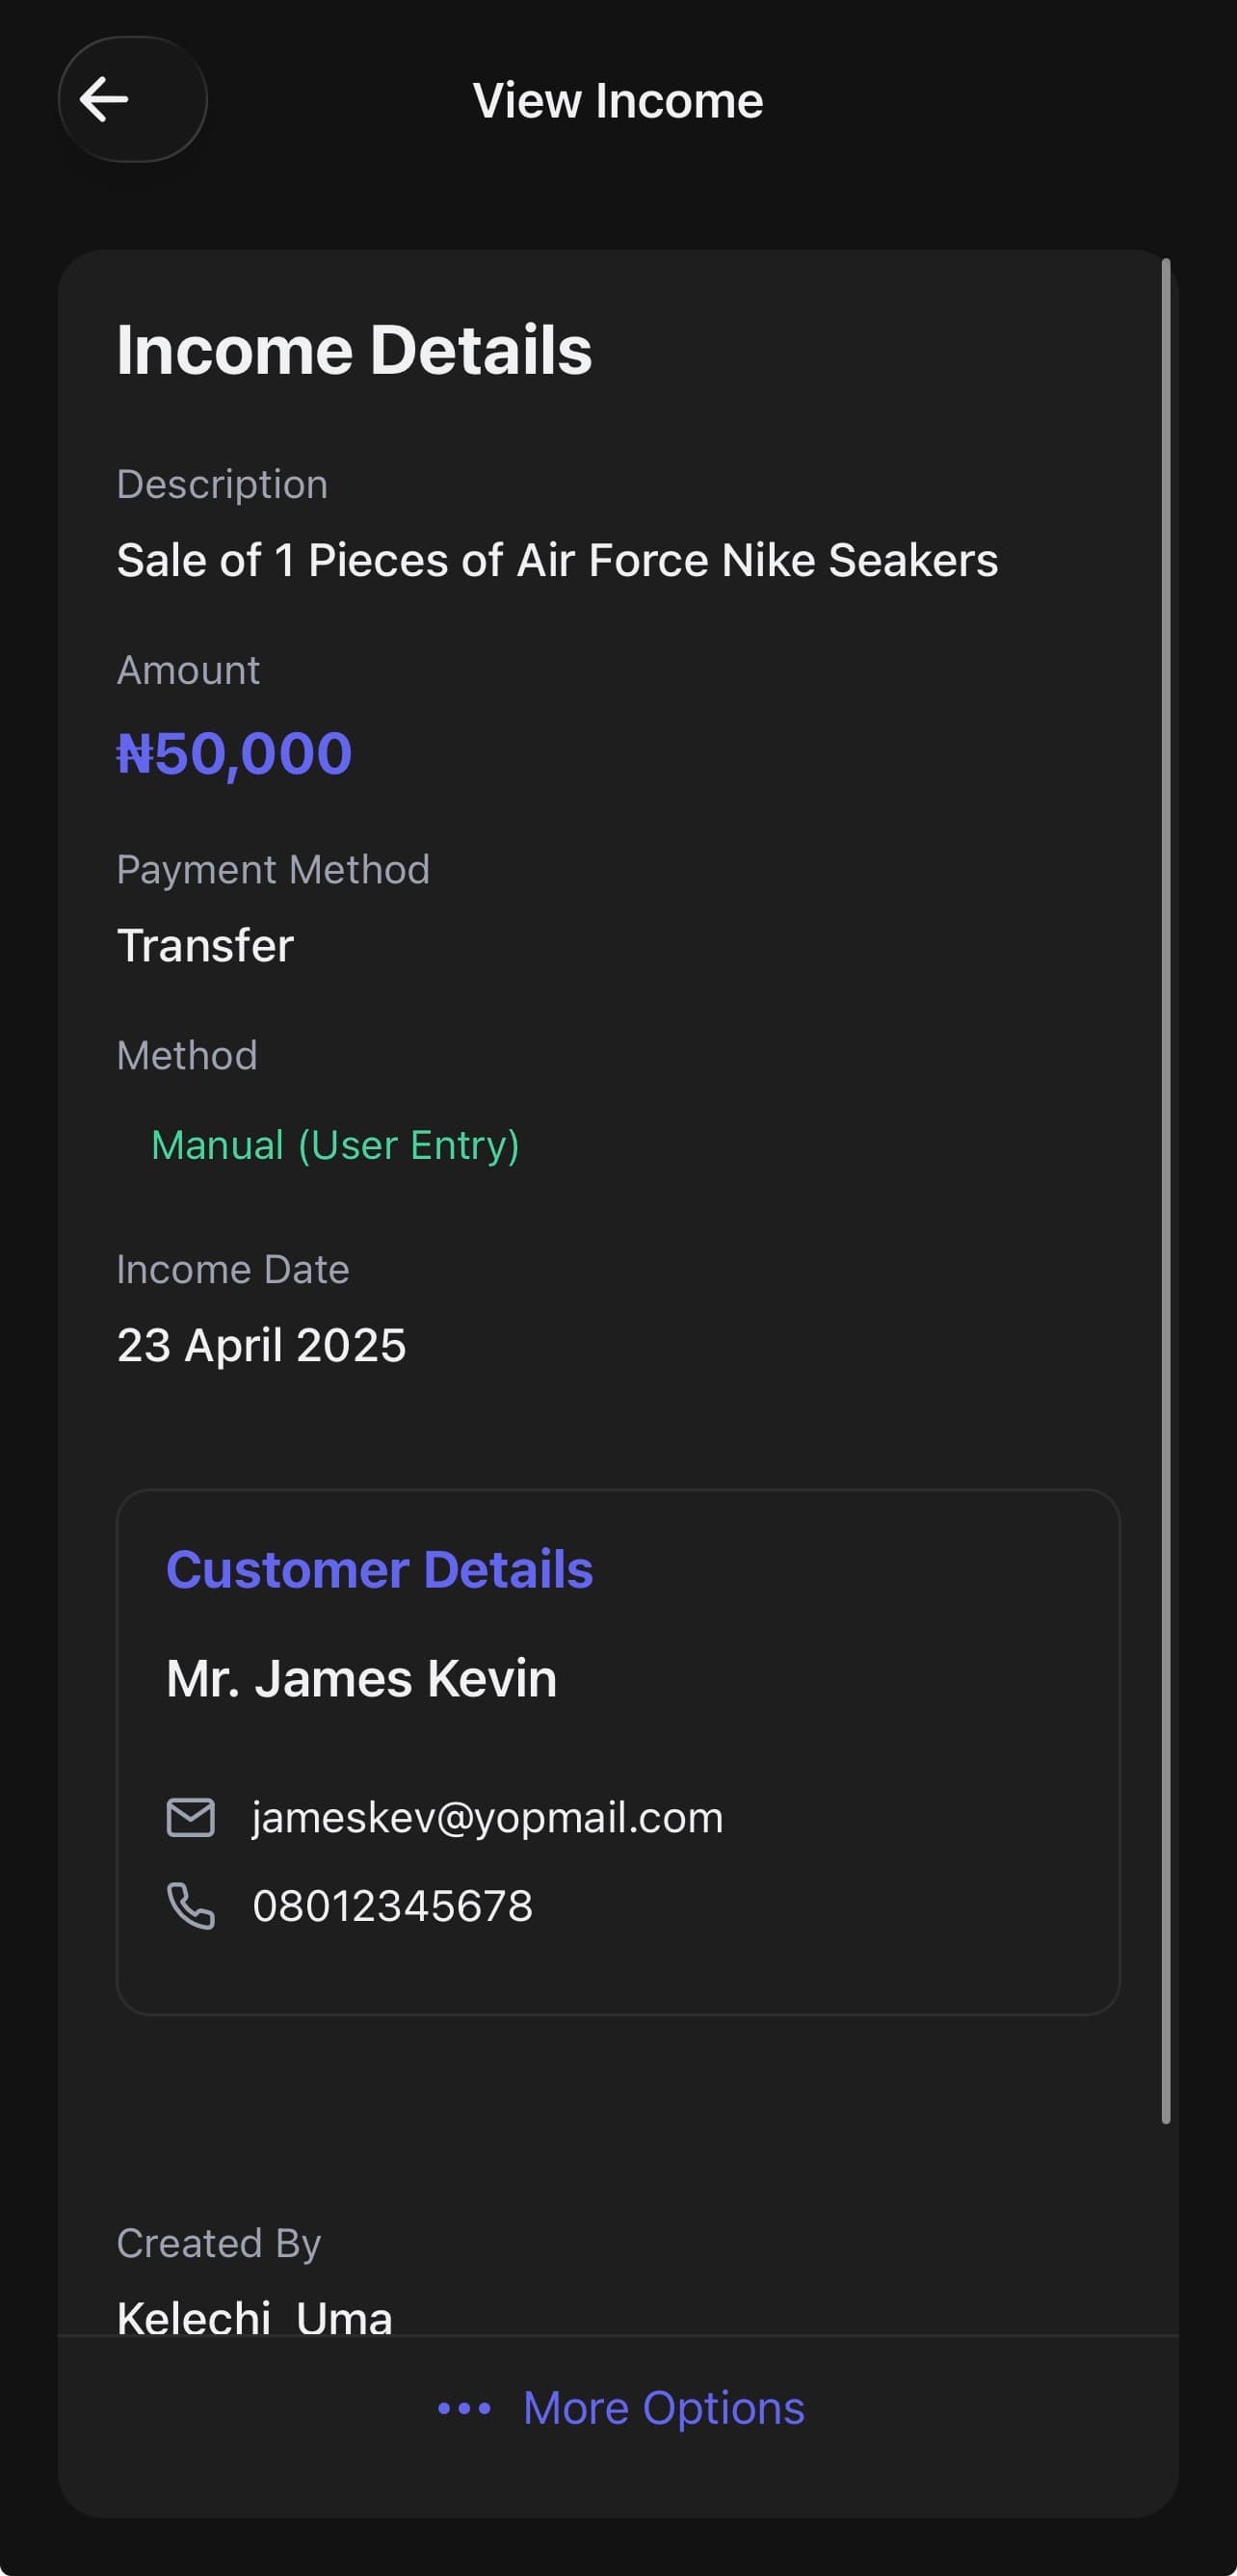
View full income details anytime
Pro tip
If a customer pays you in instalments, record each payment separately with a description like "Partial payment 1 of 2." This way your income history is accurate and easy to follow up on.
Already Running a Business? Get Nexa Free
Record income and expenses in seconds. No spreadsheets, no accountant needed.
Get Started FreeMethod 3: Upload Your Bank Statement (Bulk Import)
Best for: catching up on weeks or months of transactions at once
If you've fallen behind on recording your transactions, or you want a quick way to import everything from your bank at once, the Sync Bank Statement feature is for you. You upload your bank statement PDF and Nexa AI automatically reads and categorises every transaction — expenses and income — in real time.
Nexa supports bank statement PDFs up to 150 pages. The statement must not be password protected. This works for most Nigerian banks including GTBank, Access Bank, Zenith, UBA, First Bank, and more.
Step 1: Go to More > Sync Bank Statement
Tap the More tab in the bottom navigation. Under Features & Tools, tap Sync Bank Statement.
Step 2: Tap "Select Bank Statement"
Tap the Select Bank Statement button and choose your PDF from your phone storage. This is the statement you downloaded from your bank's mobile app or internet banking portal.
Step 3: Let Nexa AI Process It
Nexa AI reads your statement using real-time processing. Every debit is categorised as an expense. Every credit is categorised as income. You don't need to do anything — just wait a few seconds.
Step 4: Review Your Statement History
Once processed, your upload appears in Statement History with a summary showing total expenses, total income, and number of transactions imported. All entries are immediately visible in your Expenses and Income tabs.
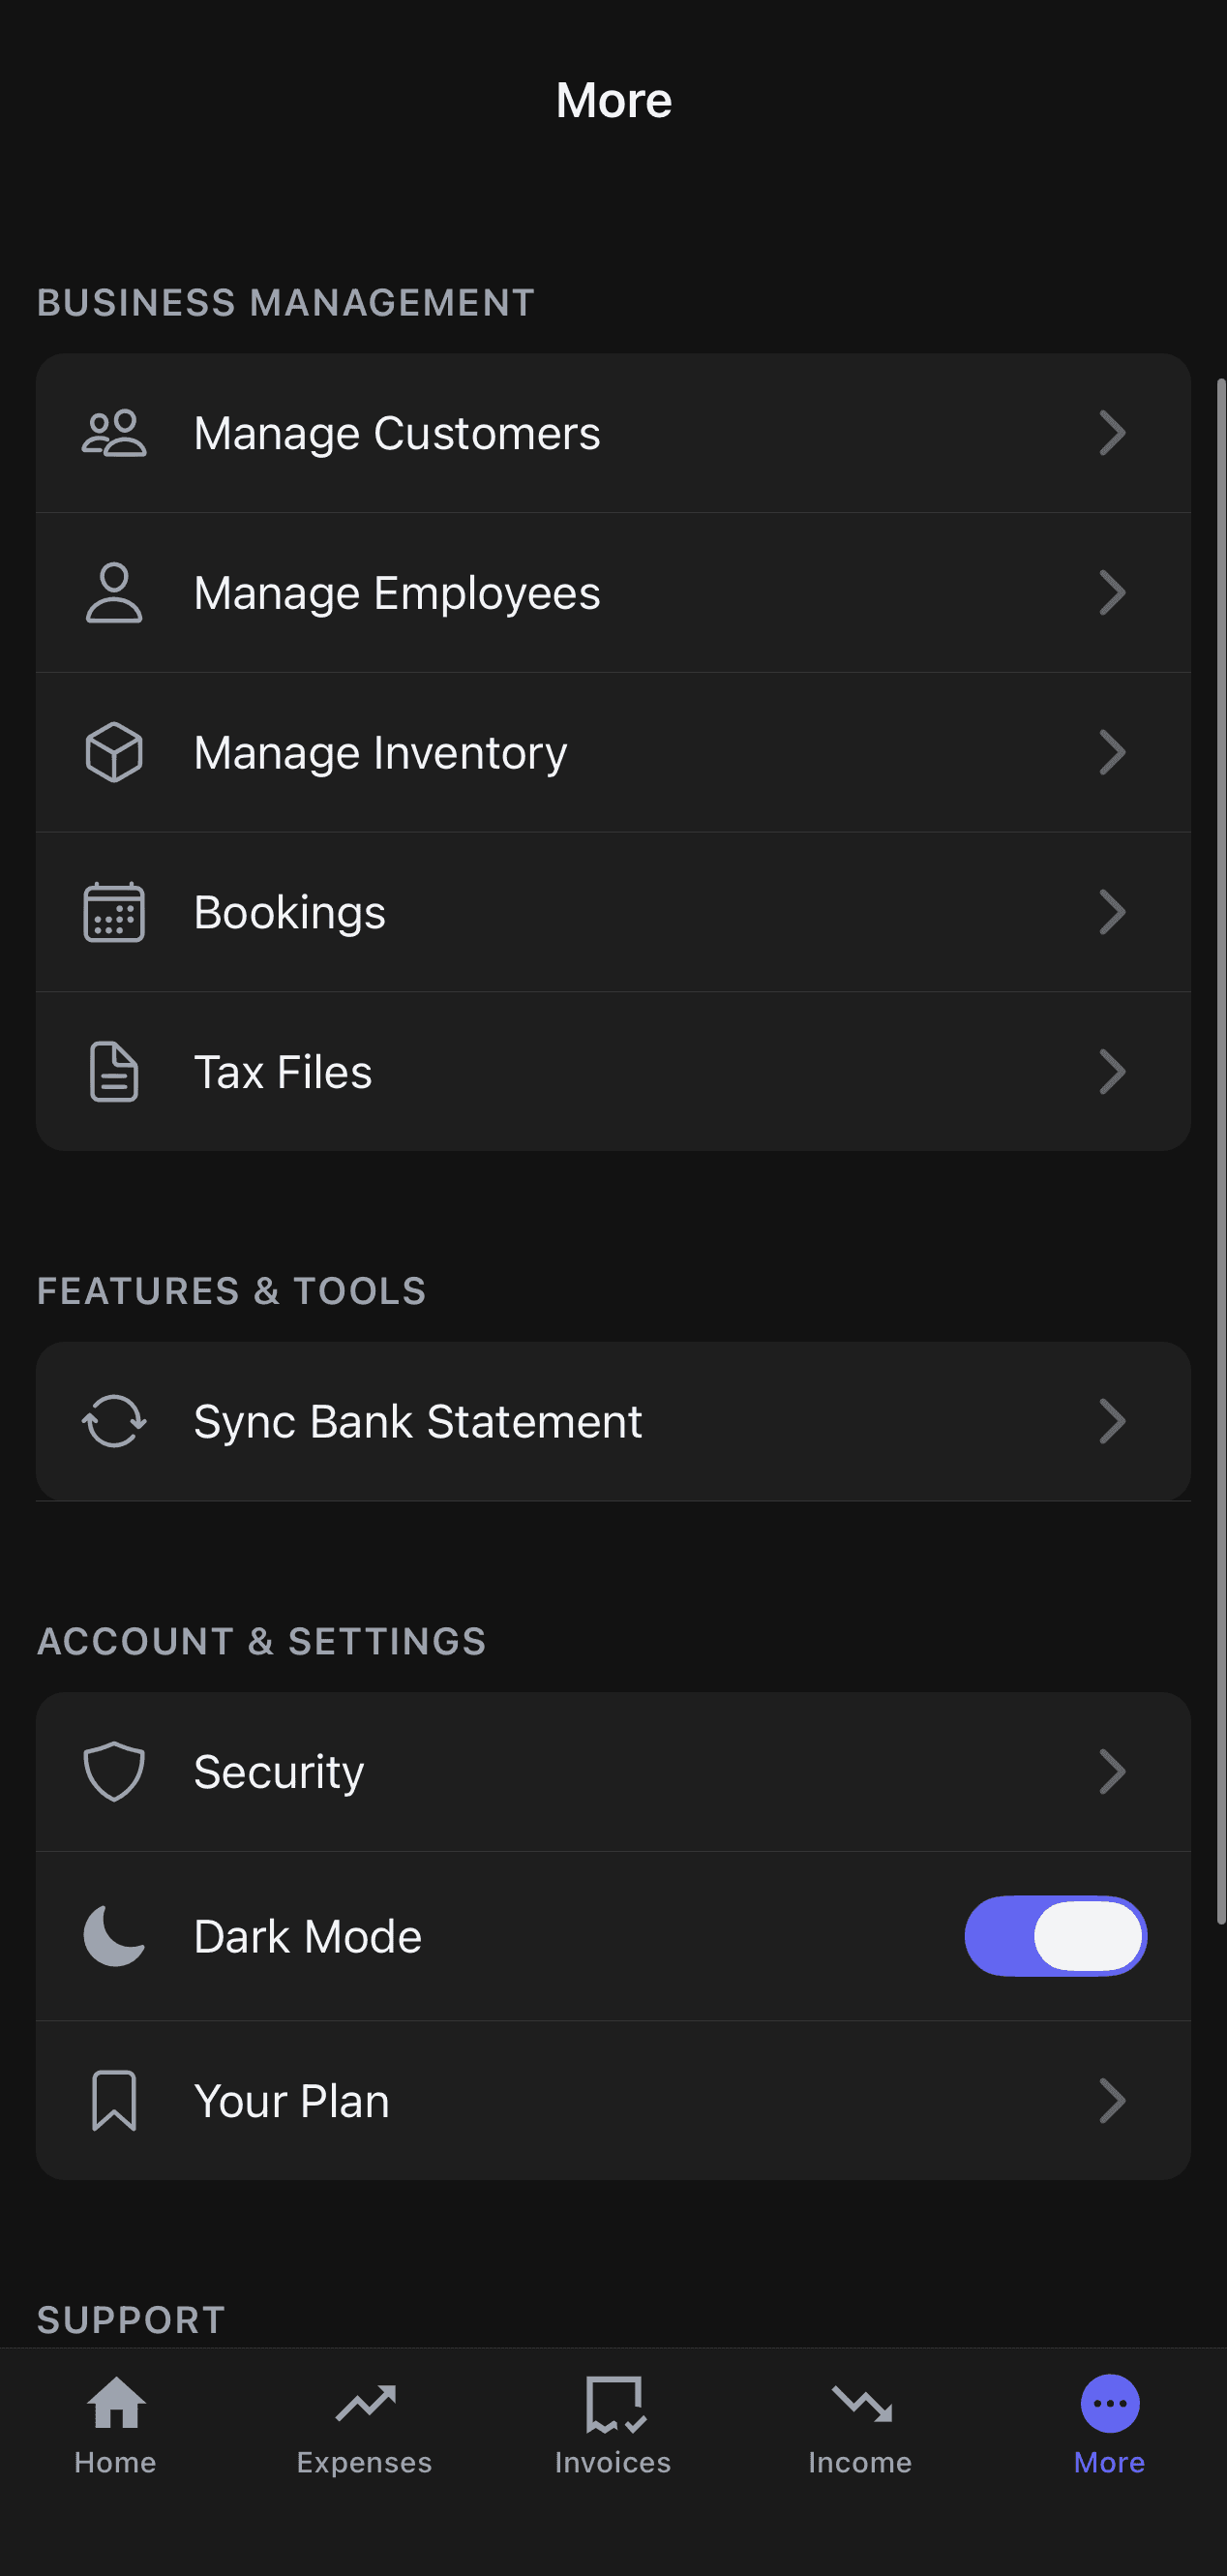
Find it under More > Features & Tools
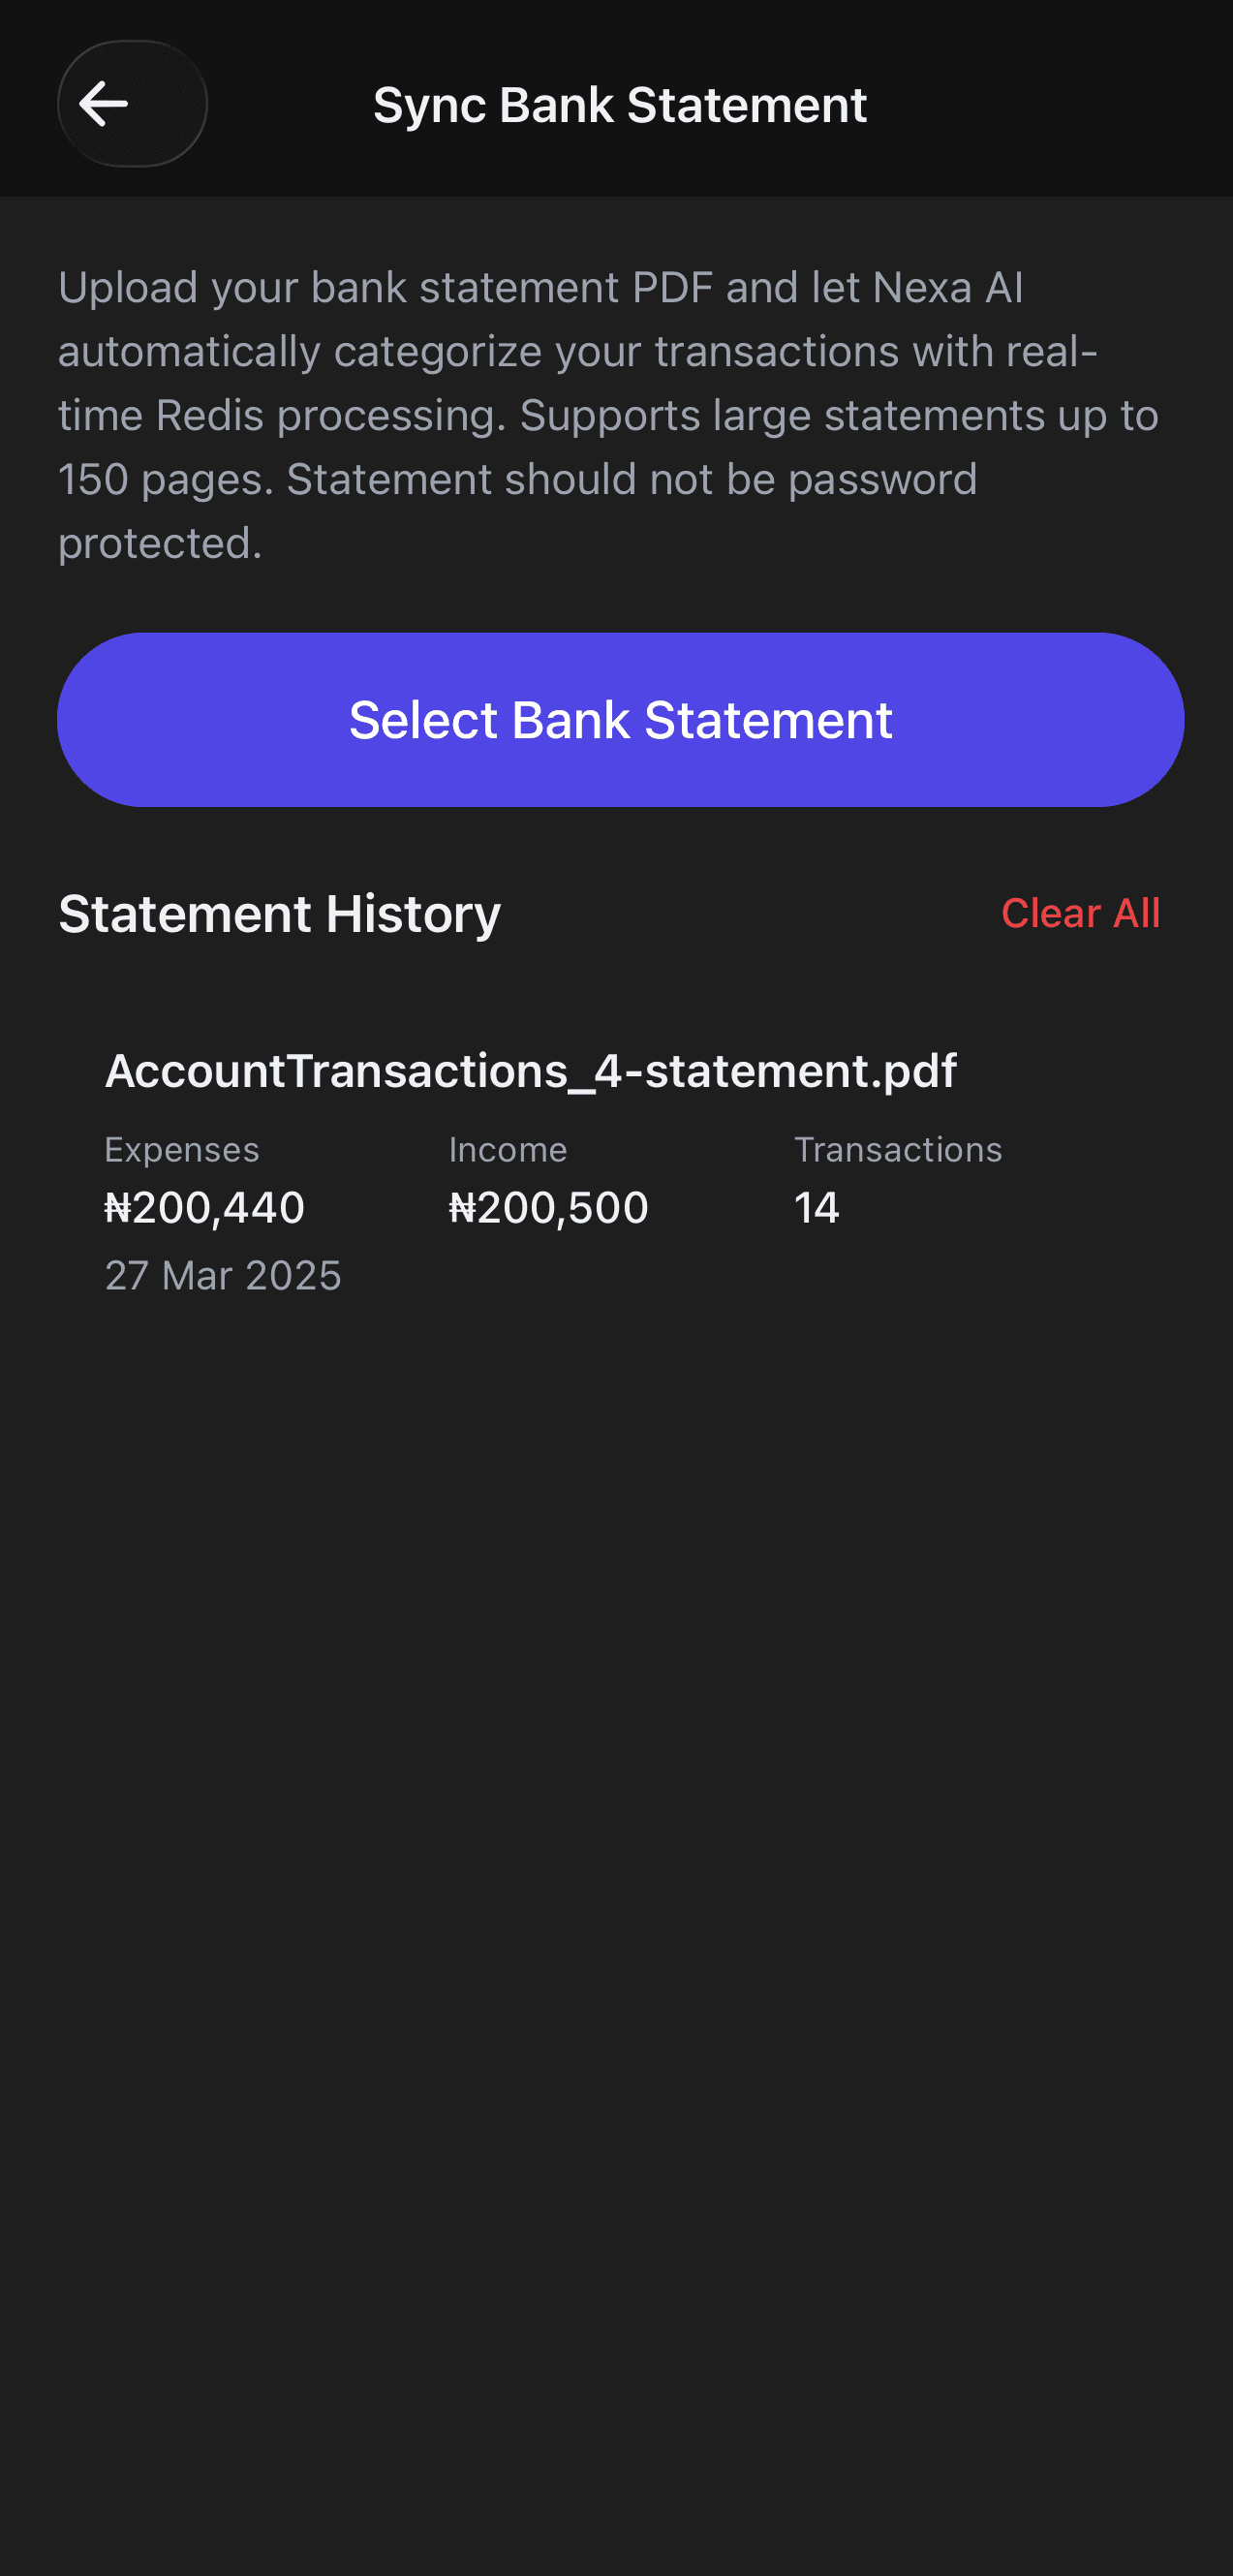
Upload once, import all transactions automatically
Pro tip
Download your bank statement as a PDF directly from your bank's app or internet banking portal, then upload it immediately. You can upload statements for multiple months separately to build a complete financial history.
Method 4: Use Nexa AI — The Simplest Approach
Best for: people who want to record transactions without filling forms
If you find forms tedious, Nexa AI is the easiest way to keep your records up to date. Just describe what happened — in plain English or even Pidgin — and Nexa handles the rest.
You say:
"I spent ₦10,000 on internet yesterday"
Nexa does:
Creates an expense of ₦10,000 under Internet, dated yesterday
You say:
"James paid me ₦50,000 for the Nike sneakers today via transfer"
Nexa does:
Creates an income of ₦50,000 via Transfer, linked to James, dated today
You say:
"I paid ₦25,000 for fabric from Balogun market in cash"
Nexa does:
Creates an expense of ₦25,000 under Inventory/Materials, paid in Cash
You say:
"Show me all my expenses for this month"
Nexa does:
Pulls up a summary of all expenses recorded so far this month
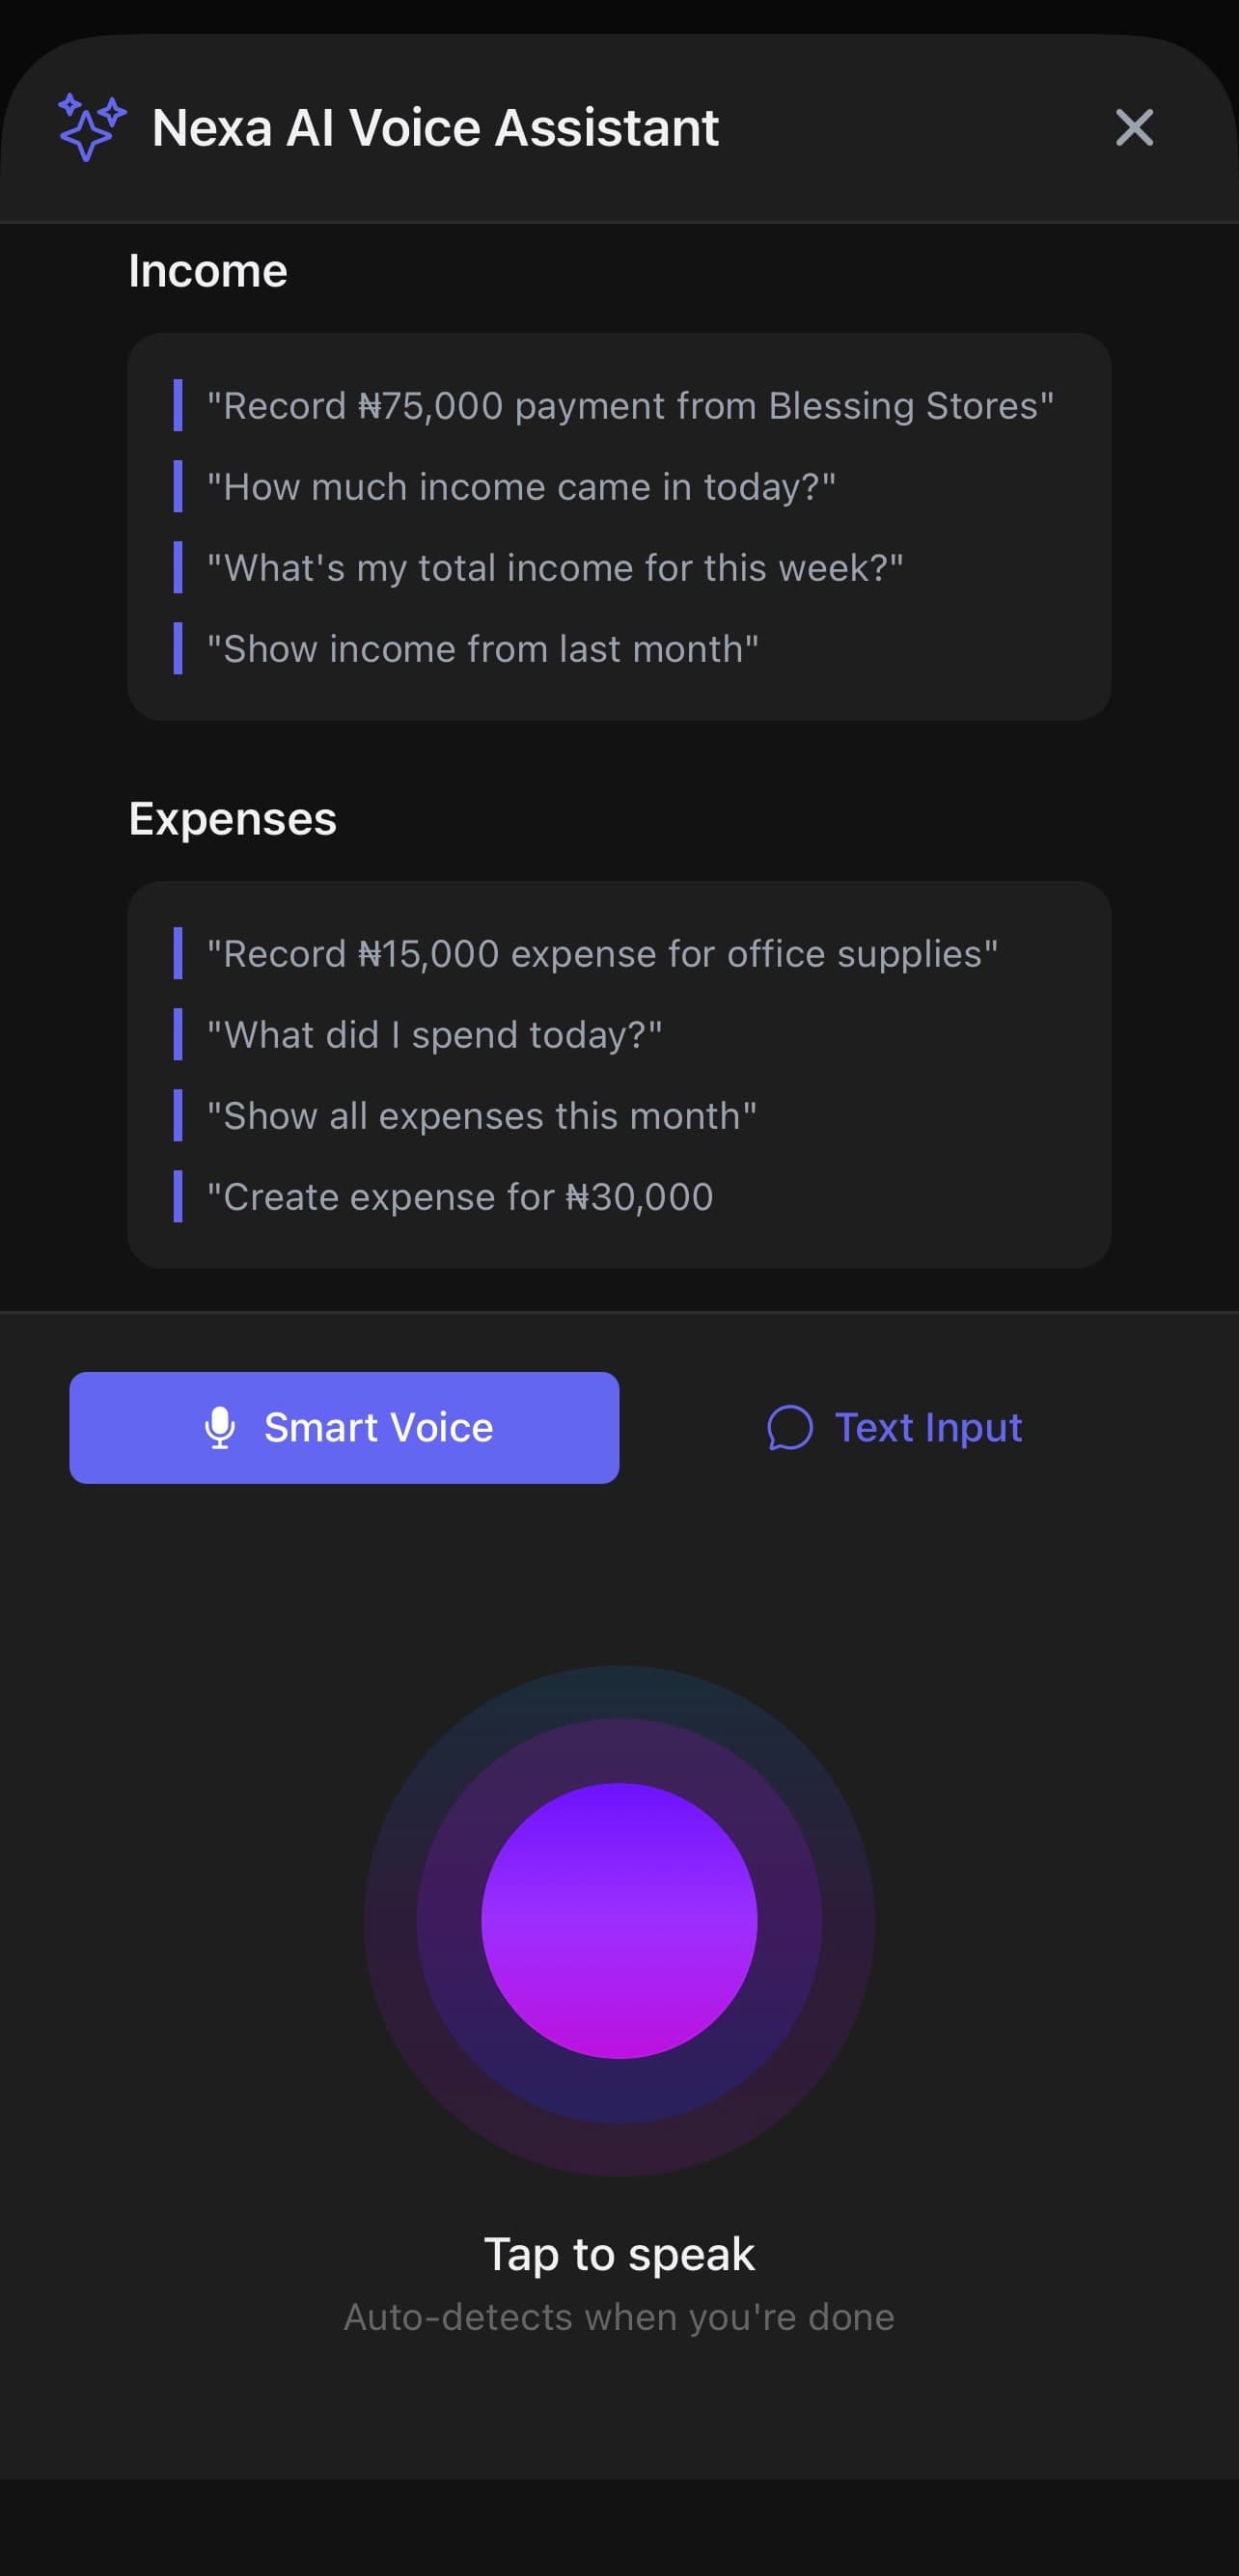
Just describe the transaction — Nexa AI records it for you
Nexa AI is available directly in the app. You can use it to record expenses, income, create invoices, check your balance, and more — all through conversation.
Which Method Should You Use?
Manual Entry (Expenses & Income)
Use this when you want full control over each transaction. Great for daily habits — record each payment as it happens. Takes under 30 seconds per entry.
Bank Statement Upload
Use this when you're catching up on a backlog, or when you want to import a full month's transactions at once. Perfect for businesses that run everything through a single bank account.
Nexa AI
Use this when you want the fastest experience. No forms, no tapping through fields — just talk to Nexa and it handles the recording. Ideal for busy business owners who are always on the go.
Most business owners on Nexa use a combination. They record day-to-day transactions manually or via AI, and then upload their bank statement at the end of the month to catch anything they missed. Use whatever keeps your books accurate with the least effort.
Your Books Won't Keep Themselves
Start recording your expenses and income on Nexa today. Manual entries, bank upload, or Nexa AI — pick your method and get your finances under control in minutes.
Start Free on Nexa →No credit card required • 30-day free trial
Download the Nexa mobile app:
Published: April 13, 2026
This guide is for educational purposes. Features shown reflect the current version of the Nexa mobile app.